Discord bot setup #
jfa-go can send notifications through Discord. You can also require it on sign-up to add a verification layer to the sign-up process for your server.
To do this, you’ll need to create a Discord bot.
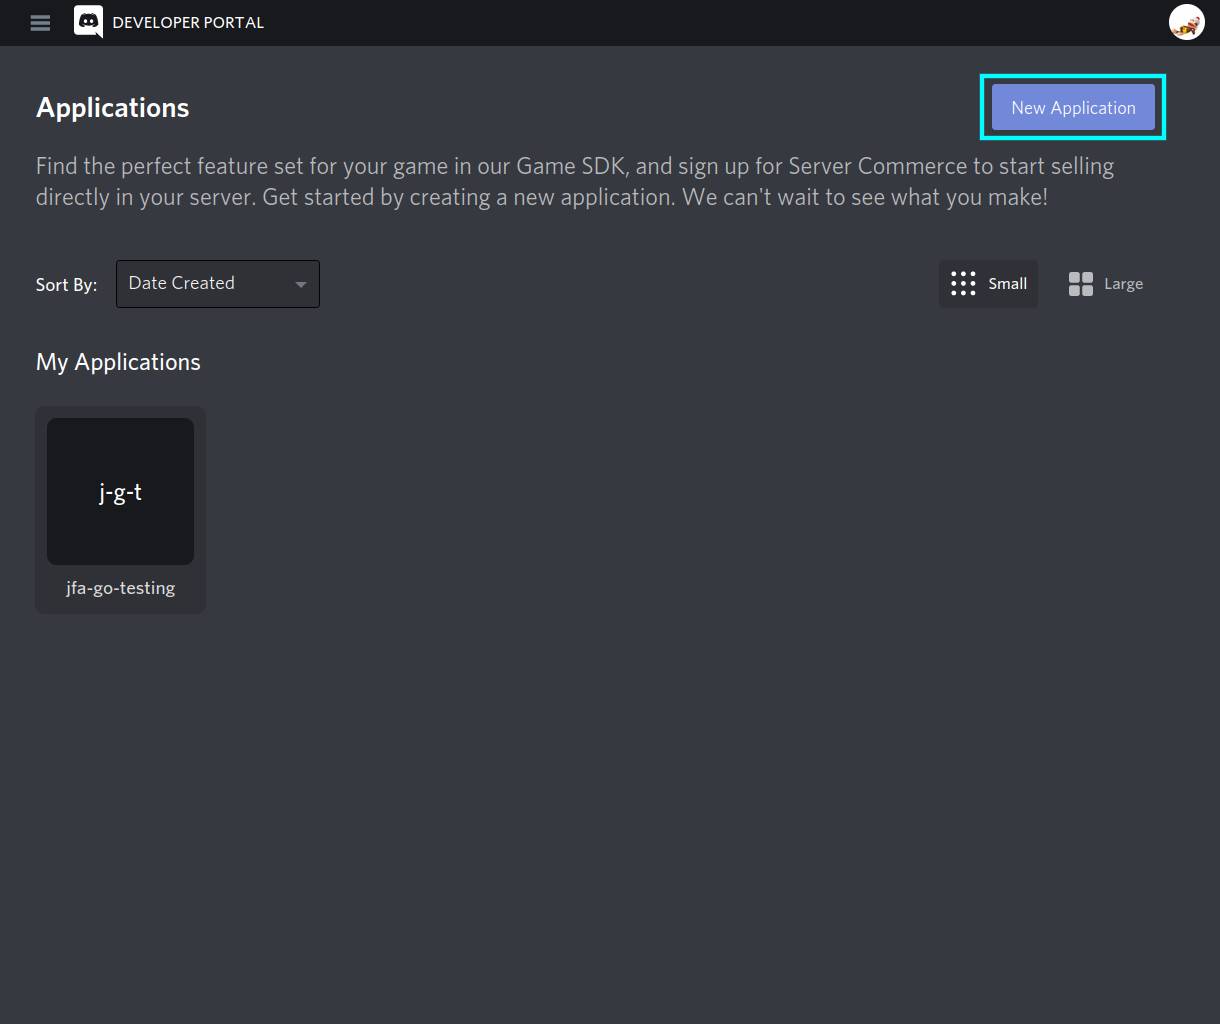
1: Create an application #
Visit discord.com/developers and log in. Press the “New Application” Button, enter a name, and press “Create”.
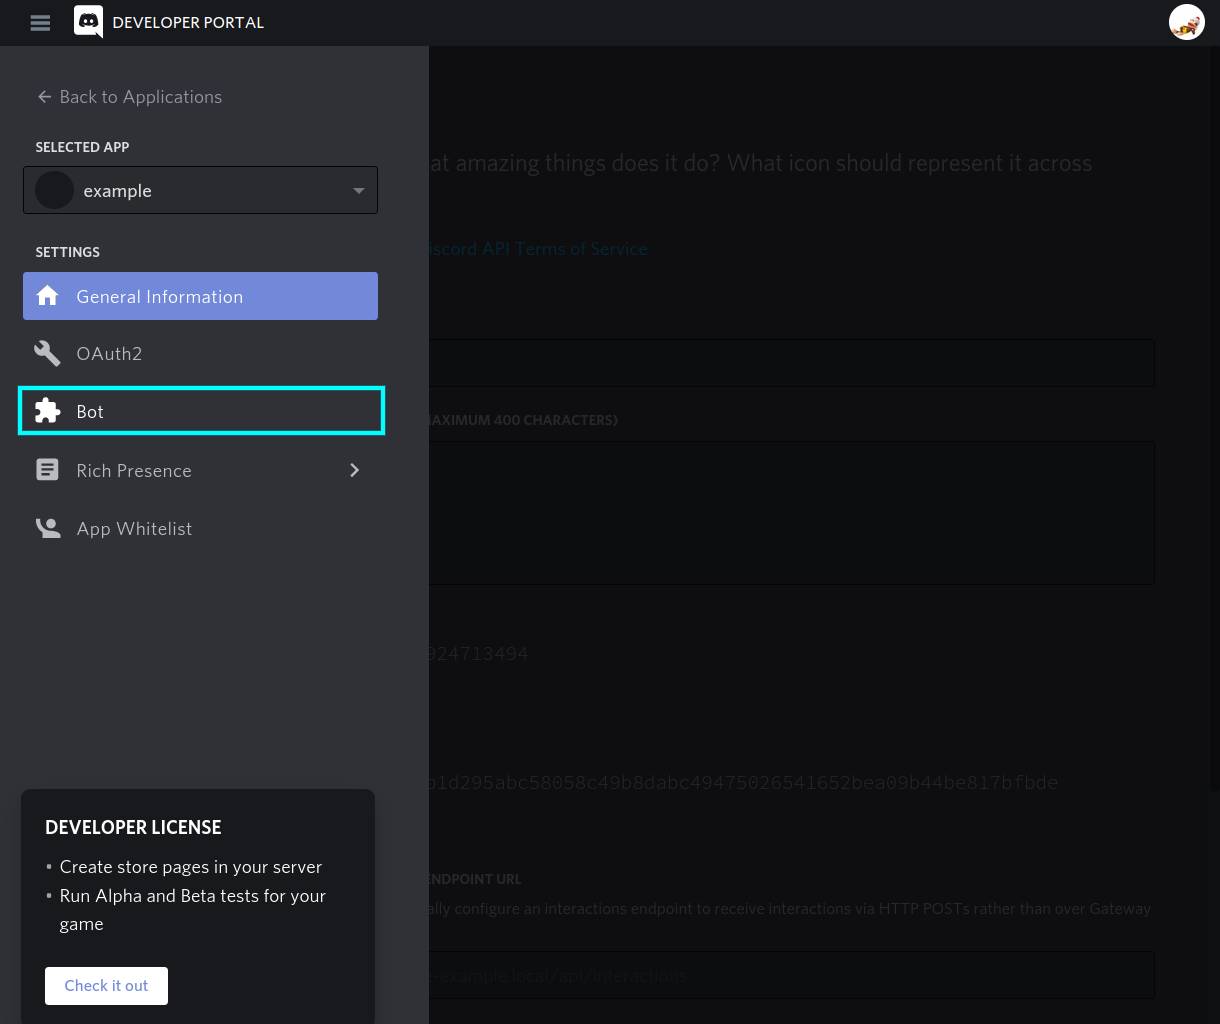
2: Go to the Bot tab #
You can leave the settings on this page alone. Open the side menu (if necessary), and open the “Bot” tab.
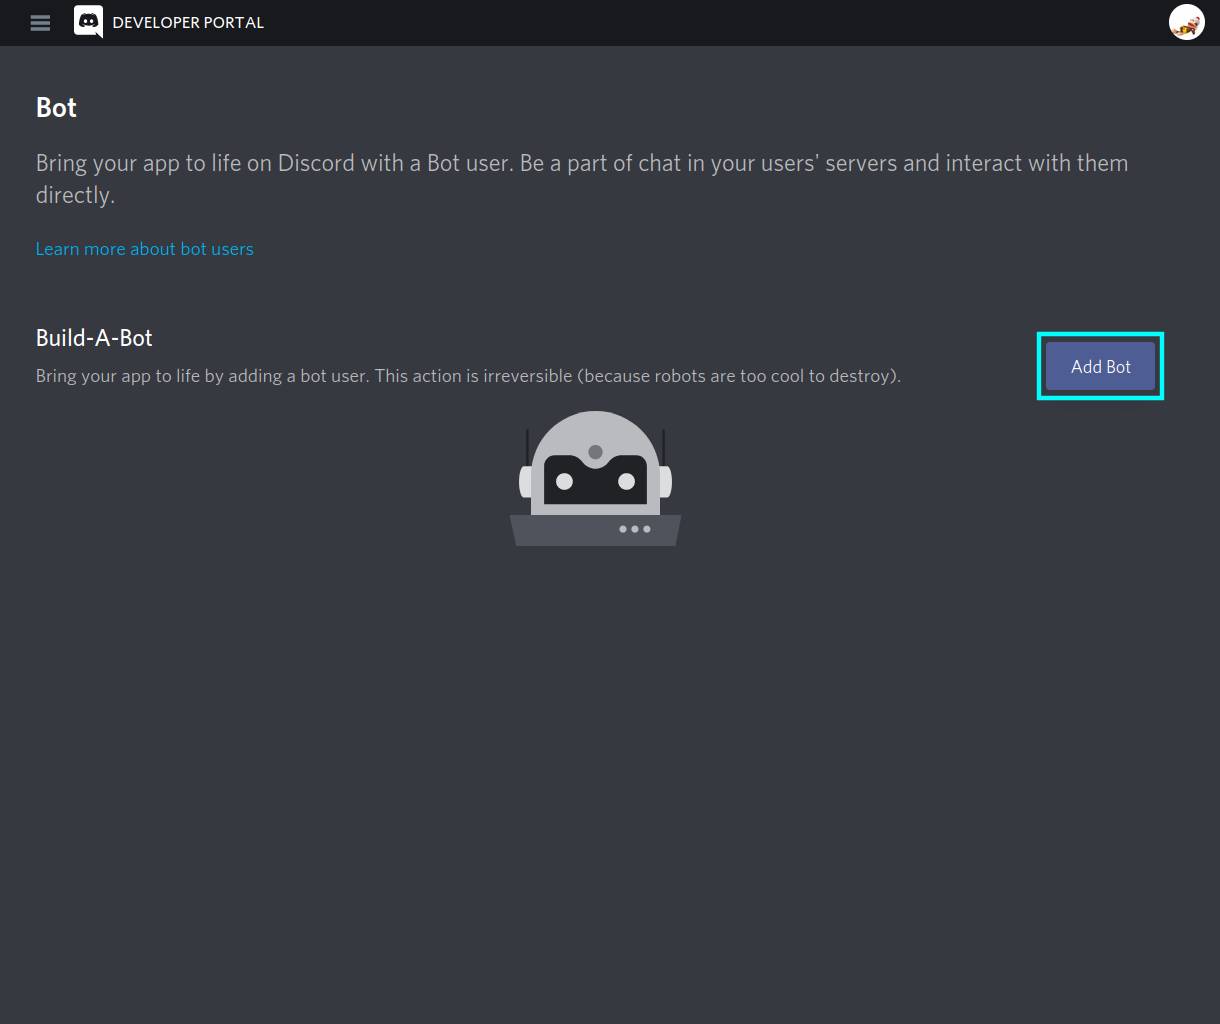
3: Create the Bot #
Press the “Add Bot” button, and “Yes, do it!” to create the bot.
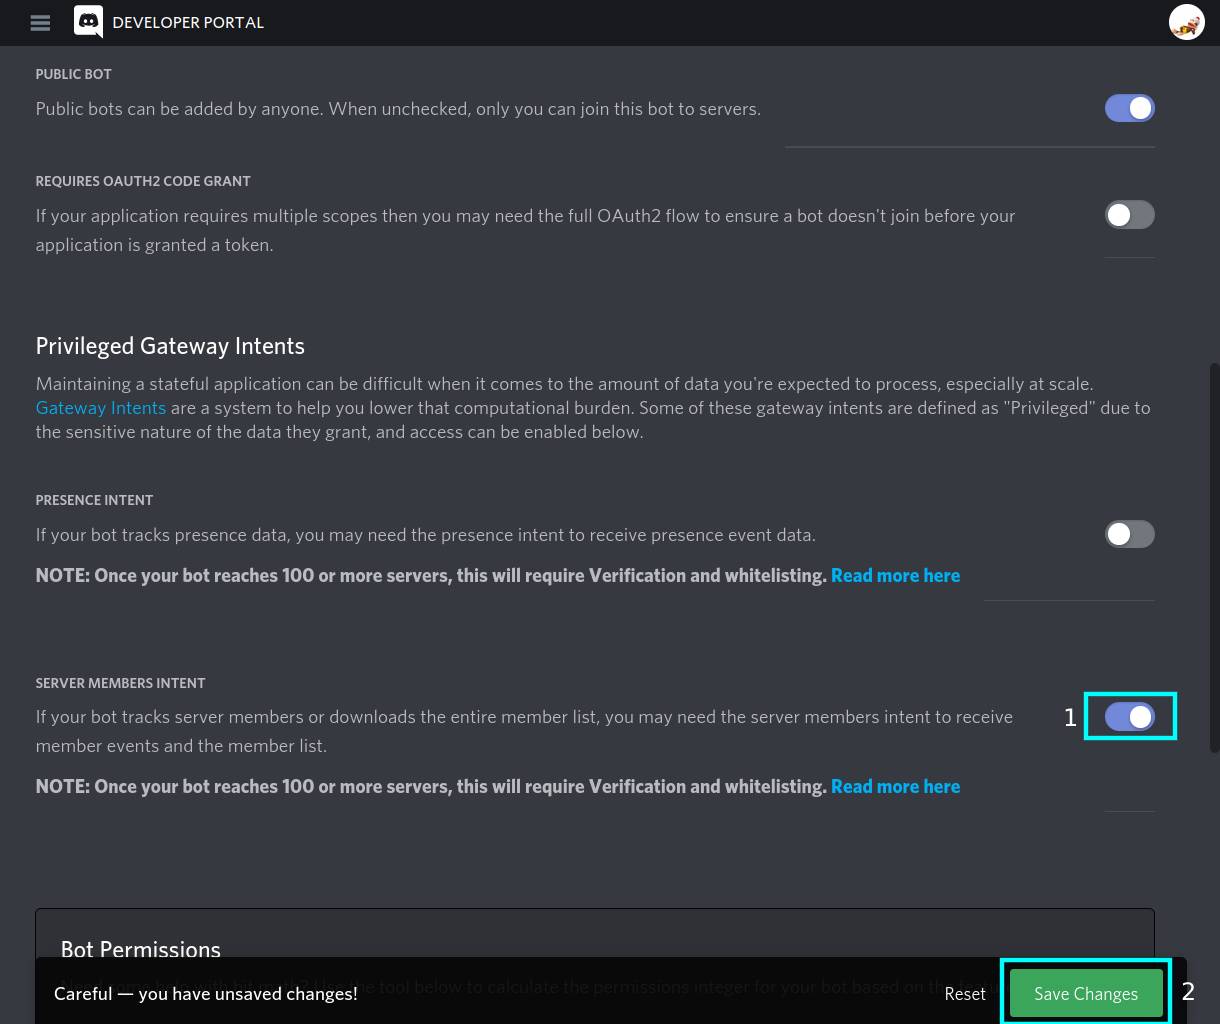
4: Enable privileged permissions #
jfa-go needs the privileged intent “Server Members” to present a list of users when you try to bind an existing Jellyfin account to a Discord one. Scroll down on the bot summary page to the “Privileged Gateway Intents” section, enable the “Server Members Intent”, then press “Save Changes” when it pops up.
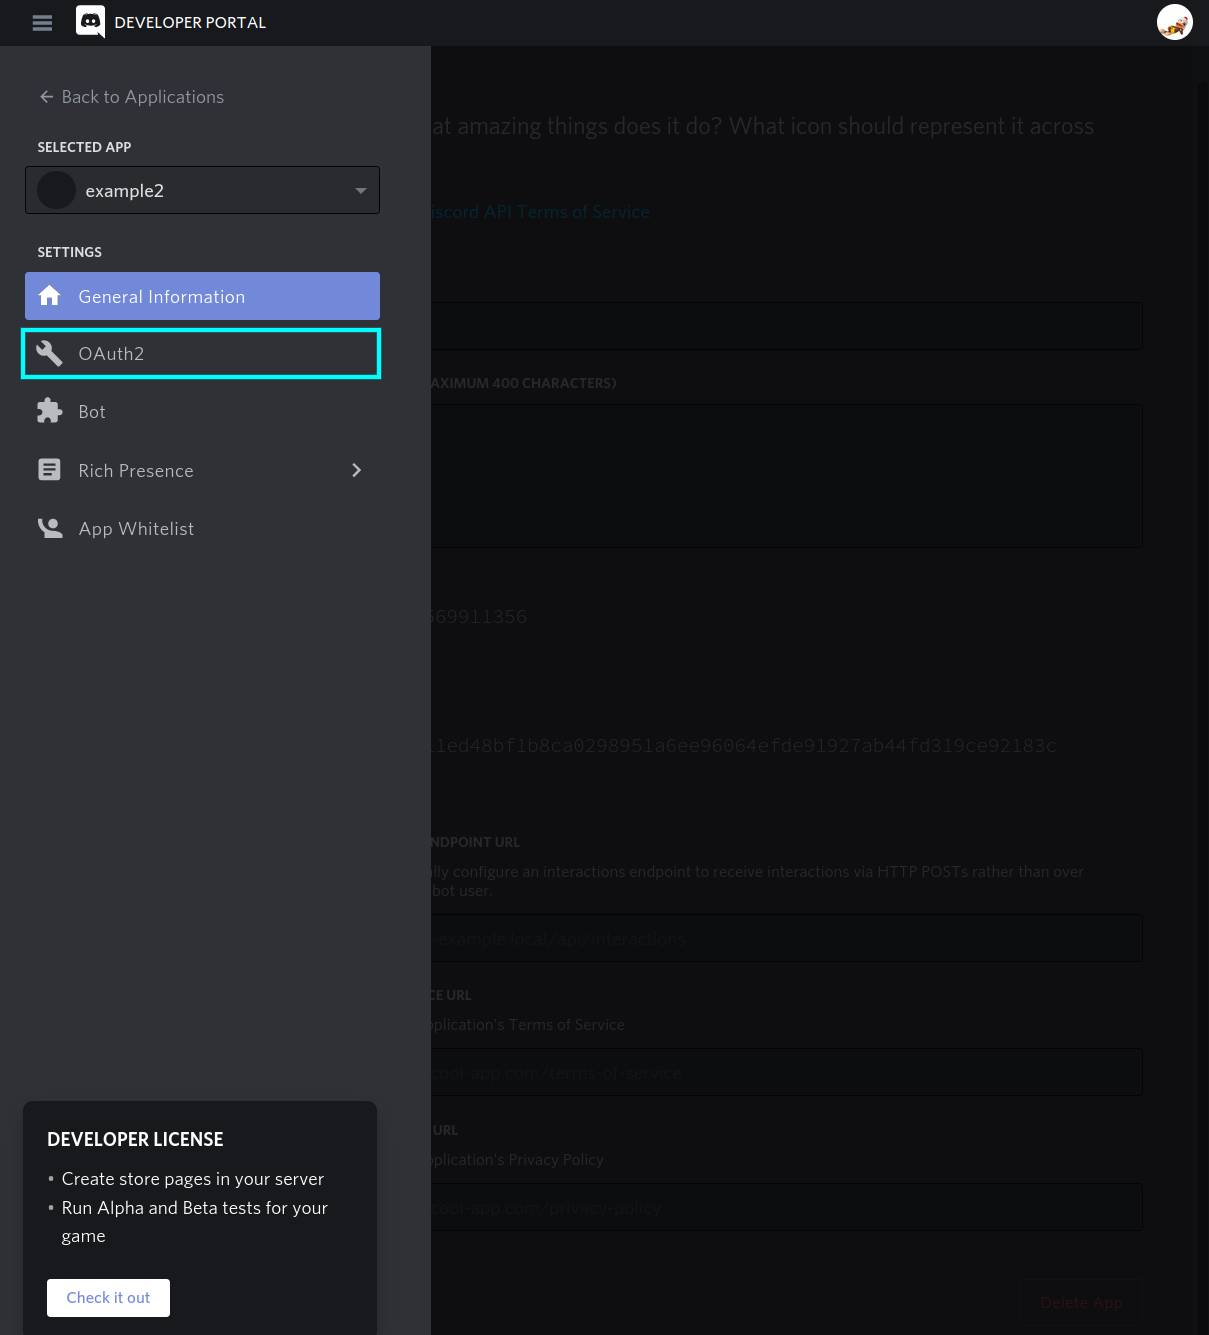
5: Switch to the OAuth2 Tab #
Open the side menu (if necessary), and open the “OAuth2” tab.
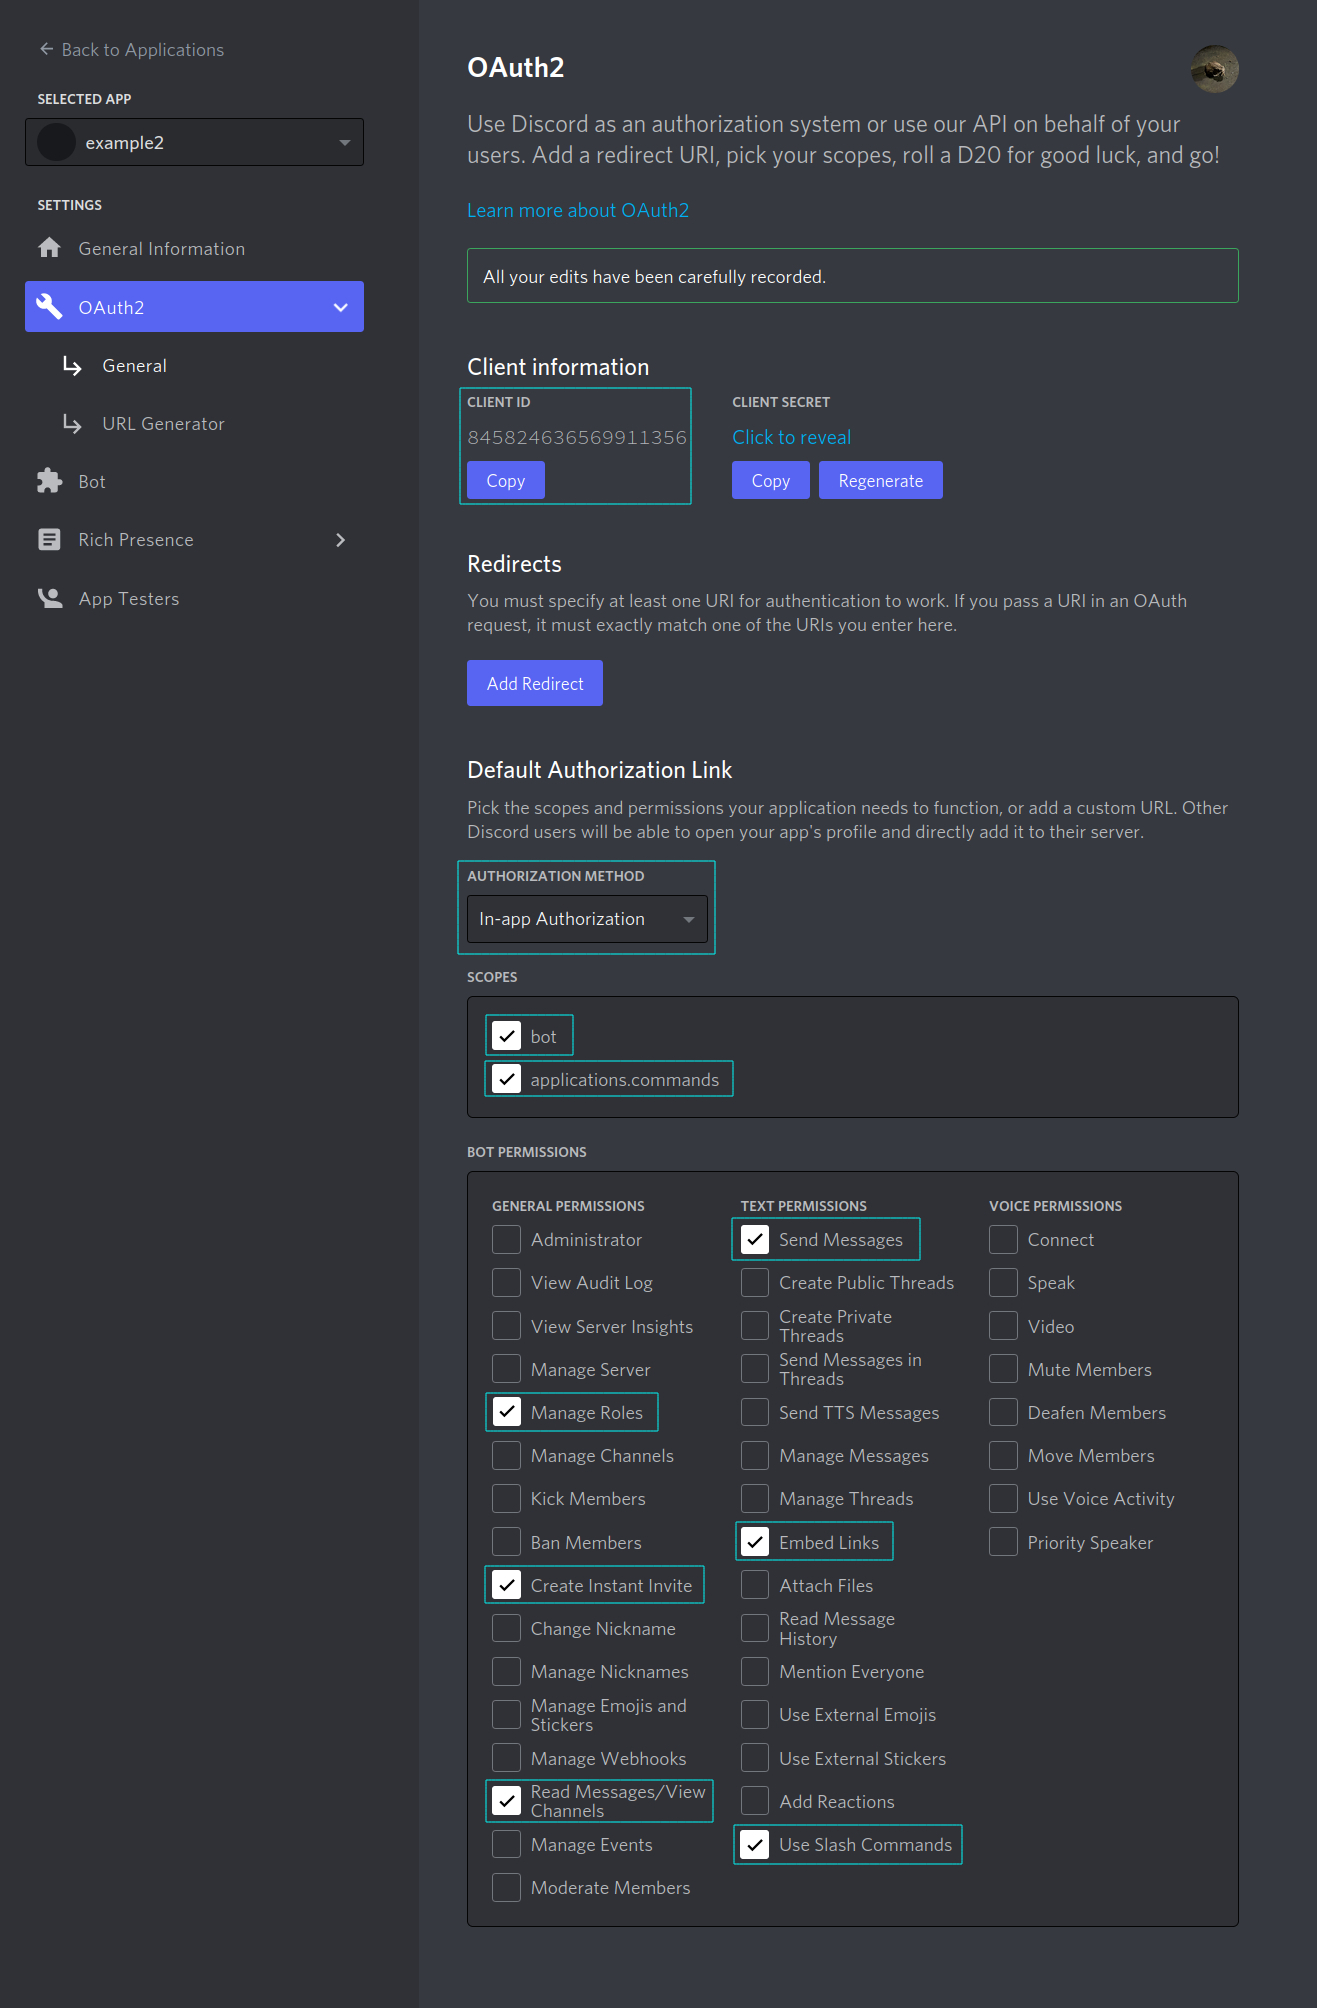
6: Enable permissions, get Invite link #
Scroll down the page to the “Scopes” section, check all the checkboxes shown below, and save. Once done, press the “Copy” button below the Client ID to copy it. Replace the YOUR_CLIENT_ID in the below link and visit it to add the bot to your desired Discord server.
https://discord.com/api/oauth2/authorize?client_id=YOUR_CLIENT_ID&permissions=2415938561&scope=applications.commands%20bot
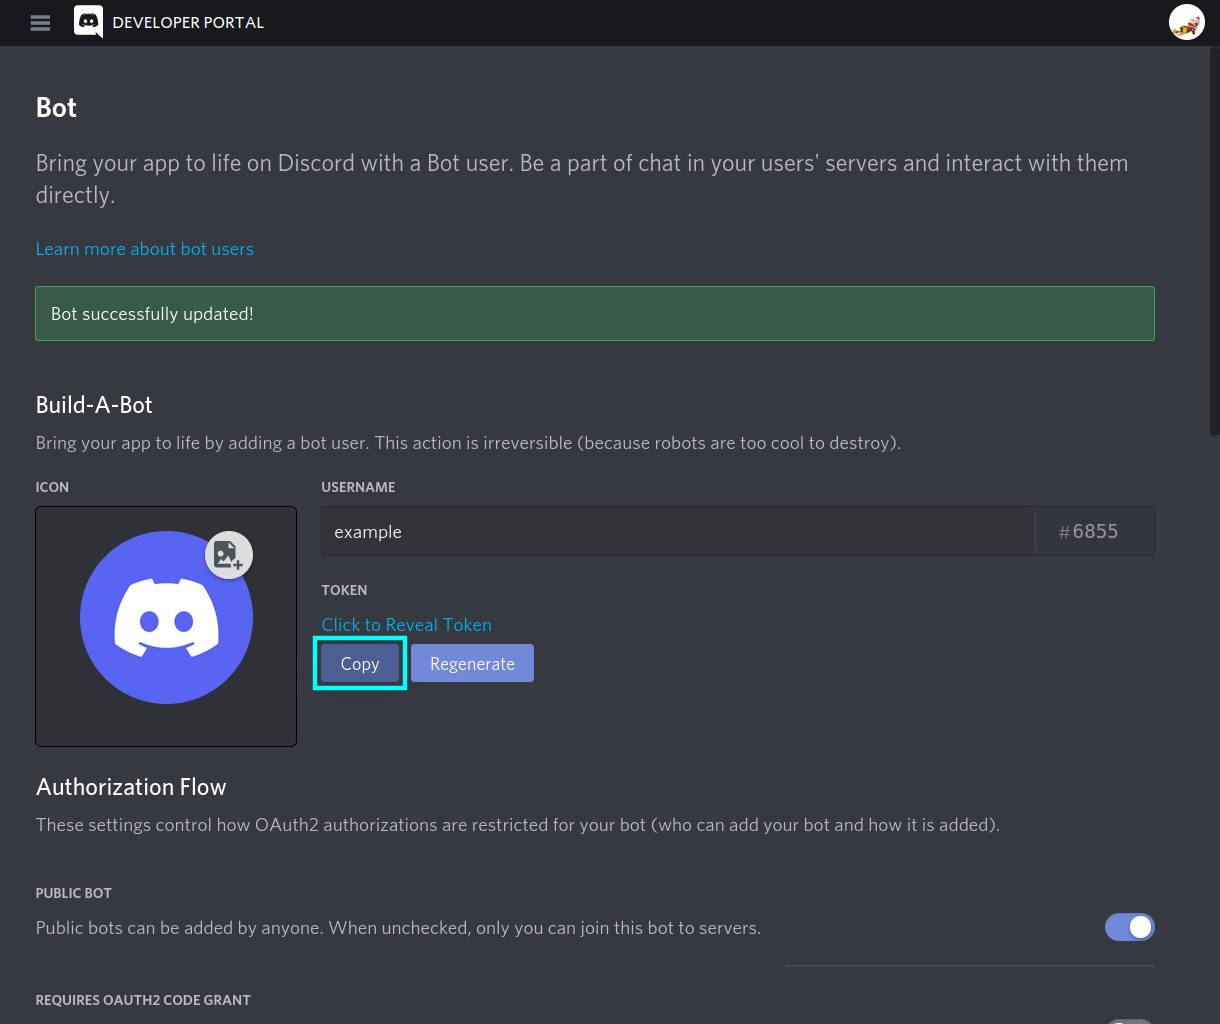
7: Copy the token #
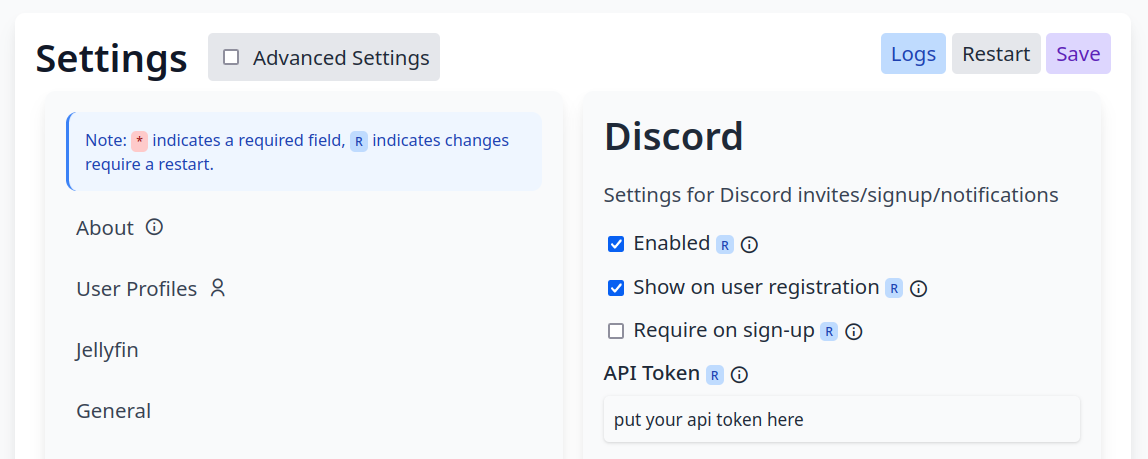
Switch back to the “Bot” tab, and press the “Copy” button to copy the bot token. In jfa-go, go to Settings > Discord, enable it, and paste the token into the “API Token” box. Save and restart.
8: Done! #
Once you’ve restarted, you should be able to add new users in the Account tab, and link your discord on the sign-up page.