Discord bot setup #
To use the Discord integration, you must create a Discord bot through their developer portal with the correct permissions, then add it to your server, as described below. This is probably the hardest bot to set up, but has the most features.
1) Create an application #
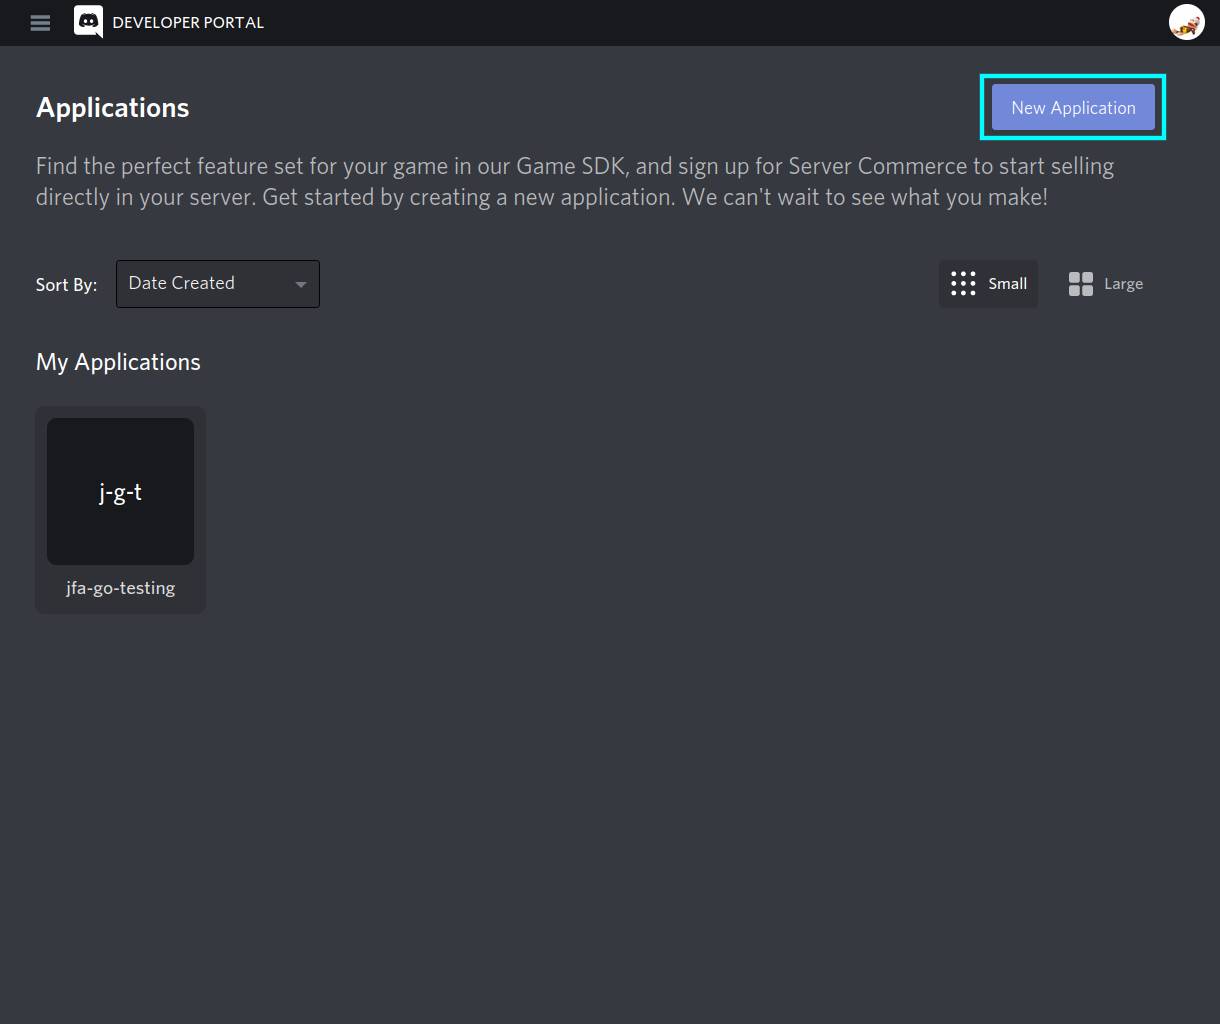
Visit discord.com/developers and log in. Press the “New Application” Button, enter a name, and press “Create”.
2) Go to the Bot tab #
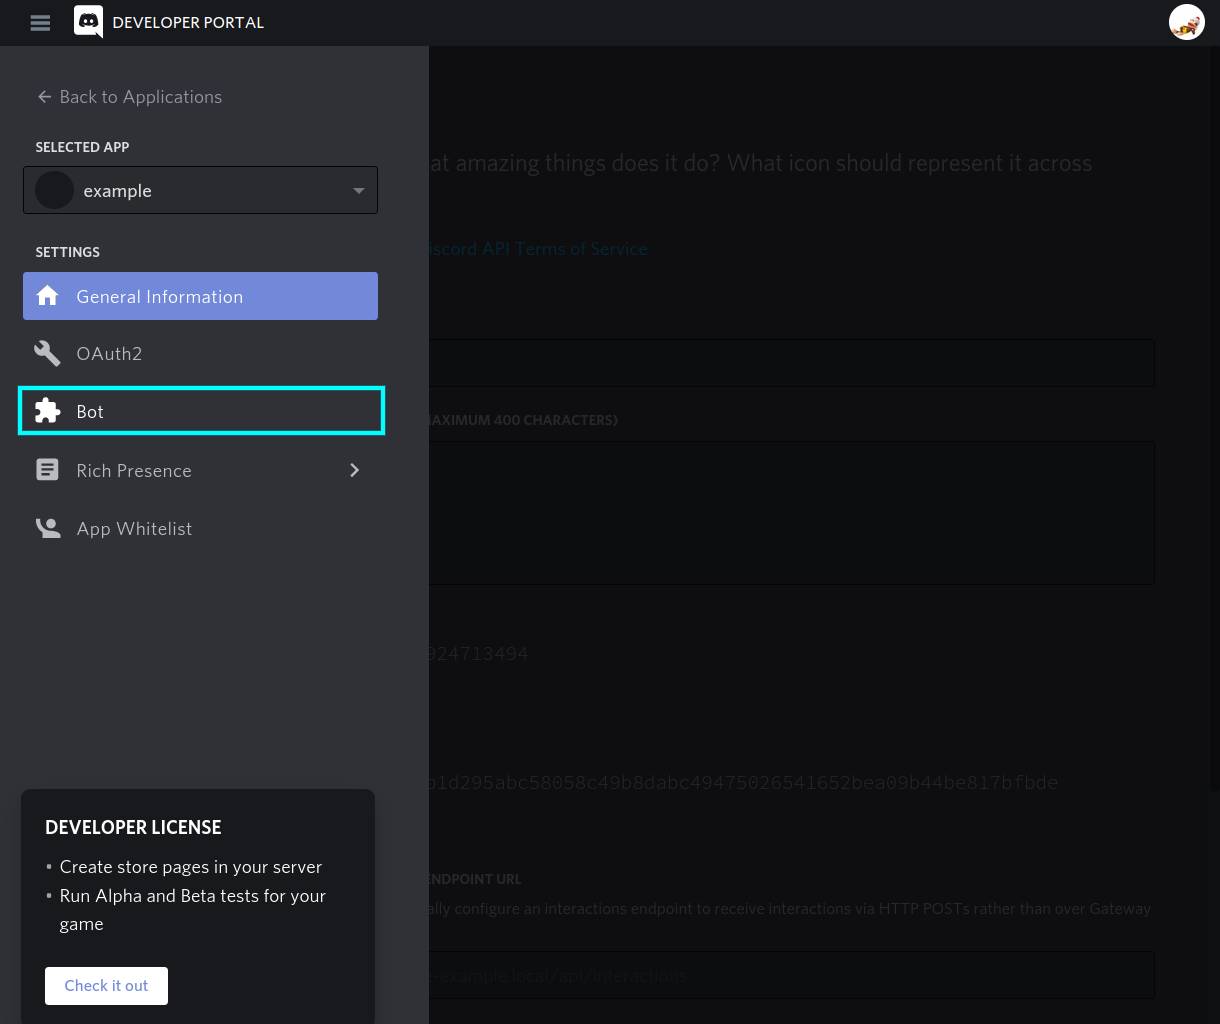
You can leave the settings on this page alone. Open the side menu (if necessary), and open the “Bot” tab.
3) Create the Bot #
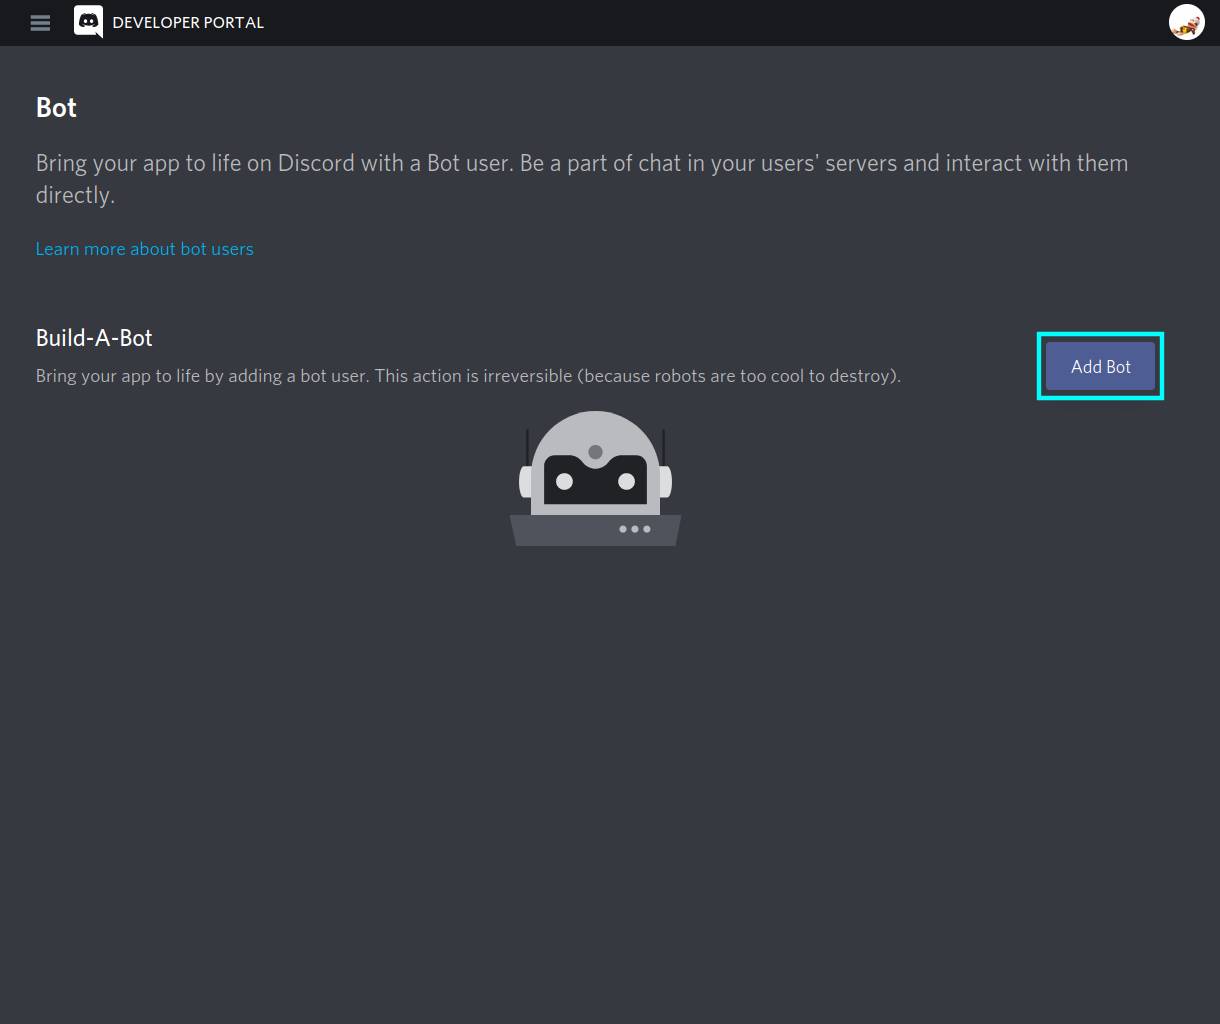
Press the “Add Bot” button, and “Yes, do it!” to create the bot. If it appears a bot already exists, don’t worry.
4) Enable privileged permissions #
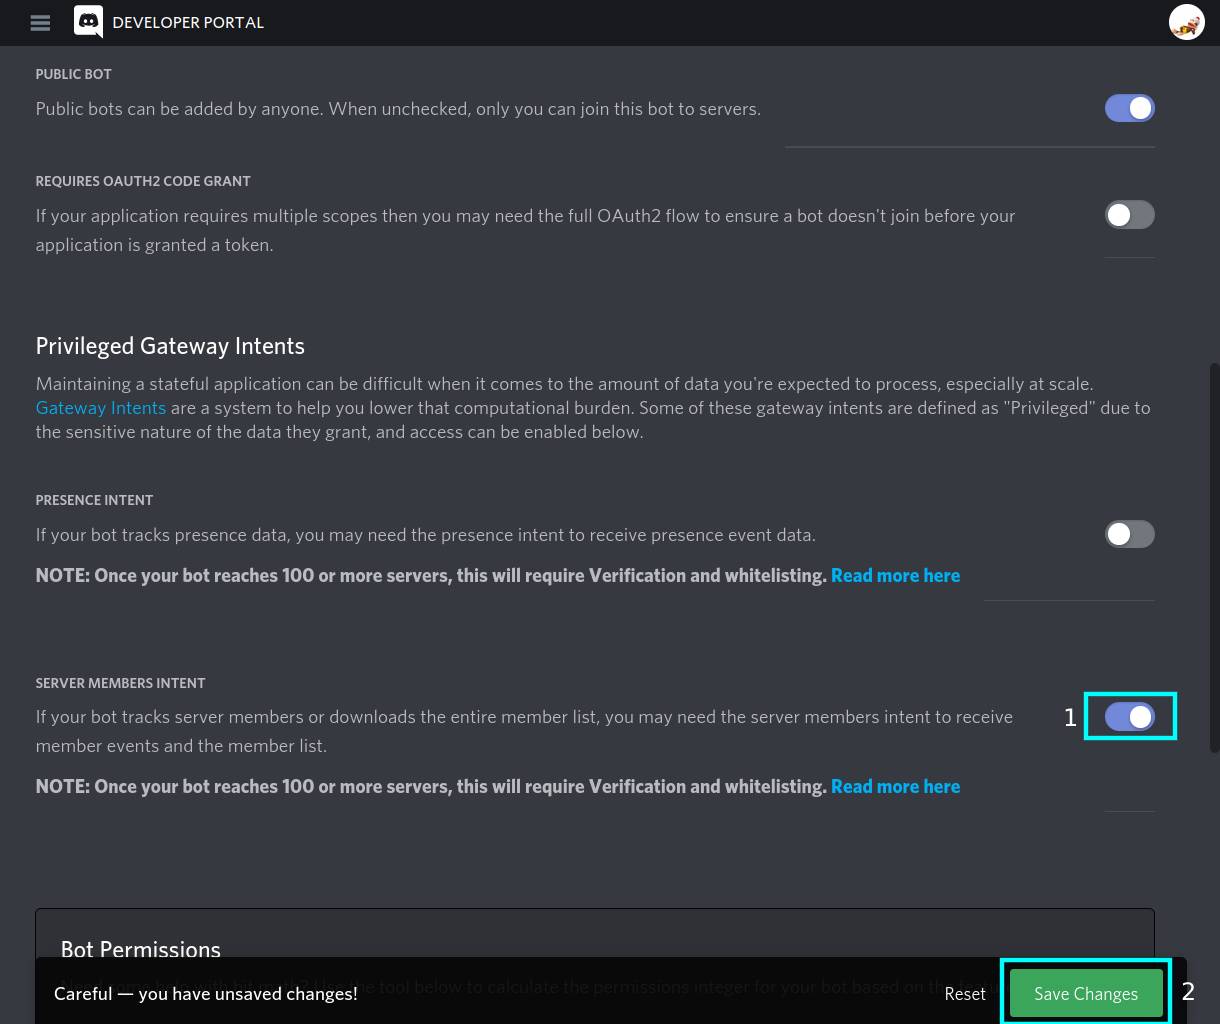
jfa-go needs the privileged intent “Server Members” to present a list of users when you try to bind an existing Jellyfin account to a Discord one. Scroll down on the bot summary page to the “Privileged Gateway Intents” section, enable the “Server Members Intent”, then press “Save Changes” when it pops up.
Extra note: jfa-go previously didn’t use Discord’s command system, instead reading messages sent with a “!” prefix. If you still want to use this, or are running an old version, also enable “Message Content Intent”.
5) Switch to the Installation Tab #
Open the side menu (if necessary), and open the “Installation Tab”. Ensure “User Install” is disabled, and “Guild Install” is enabled under “Installation Contexts”, then press “Save Changes” once it pops up.
5) Switch to the OAuth2 Tab #
Open the side menu (if necessary), and open the “OAuth2” tab.
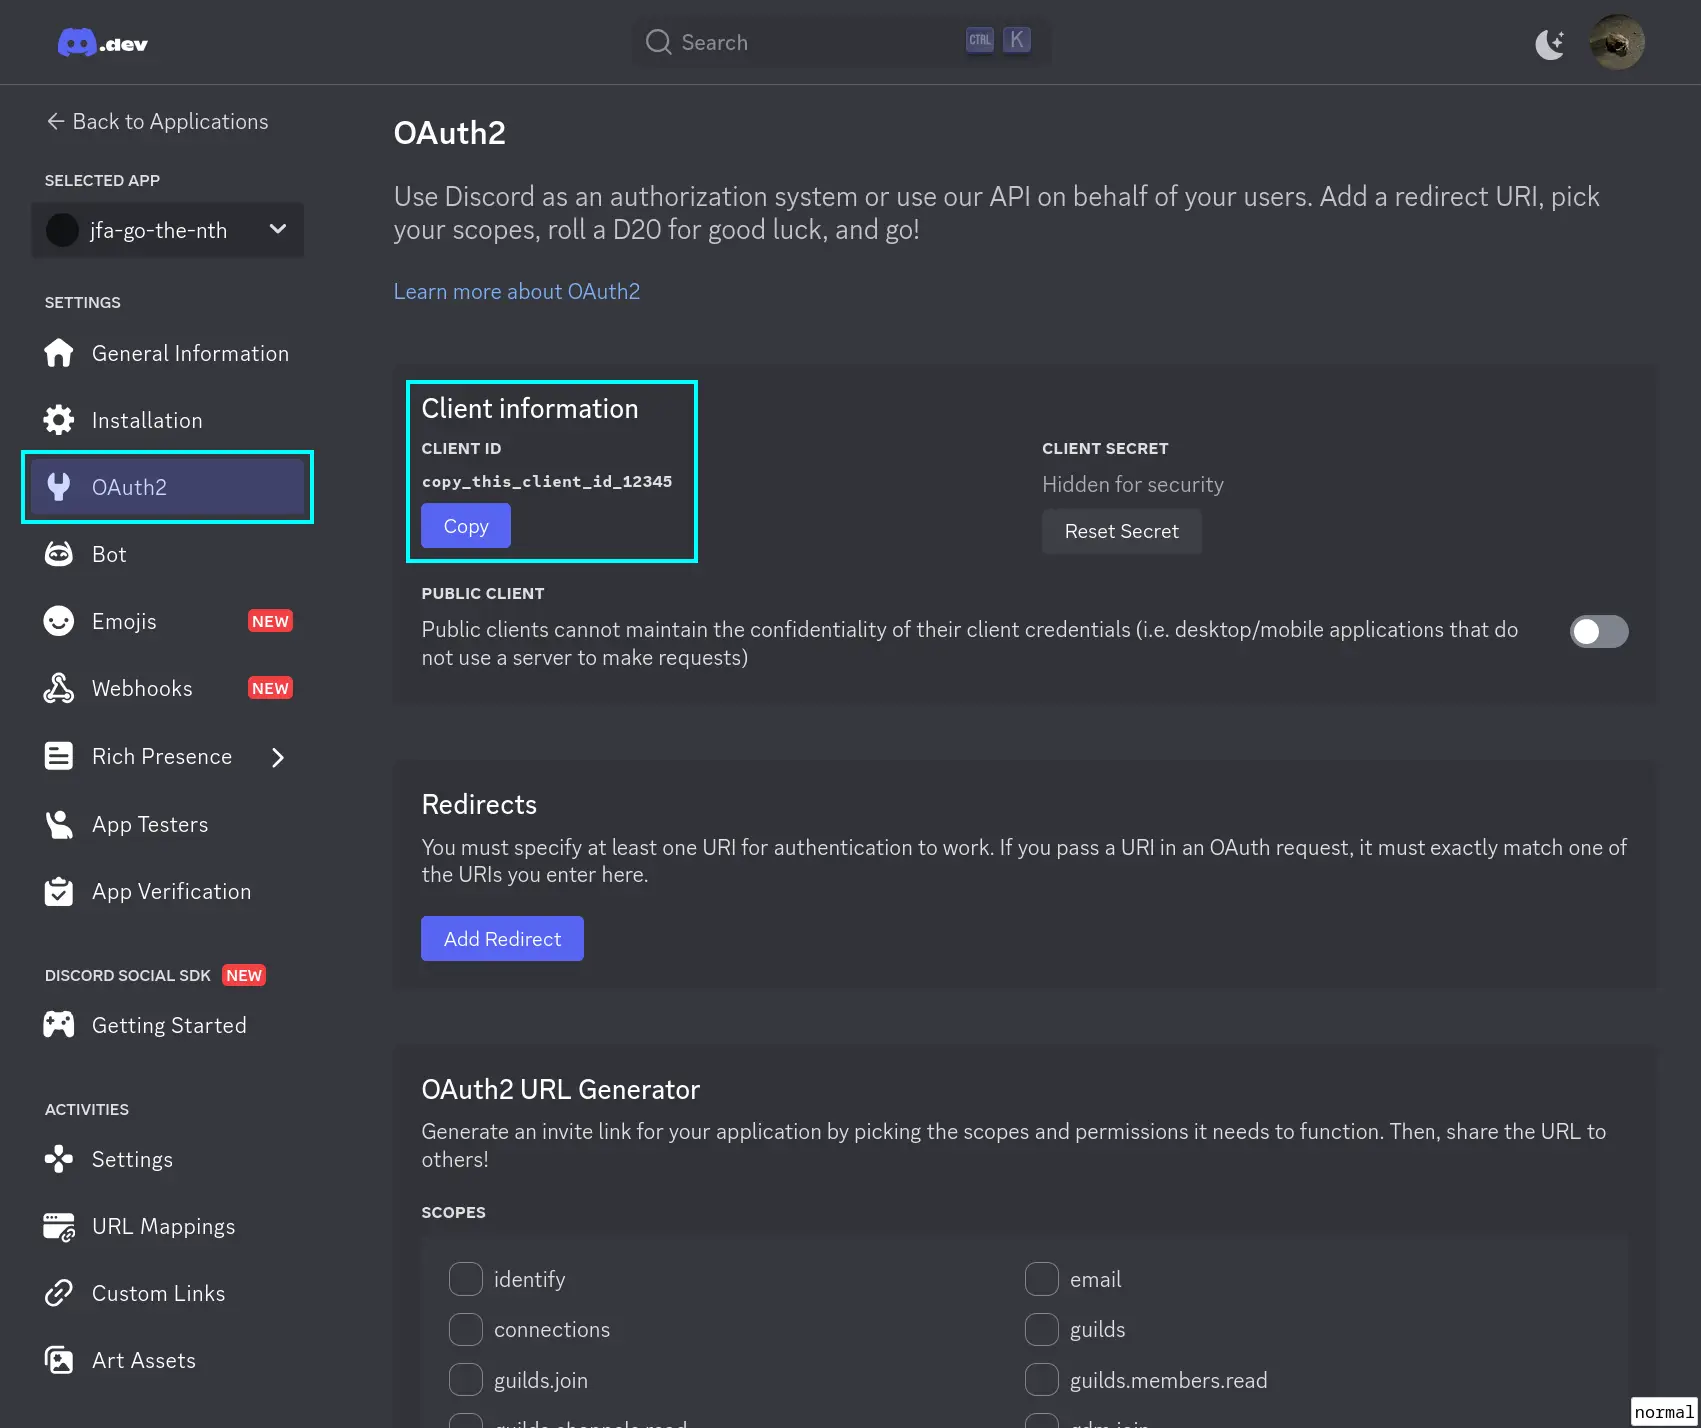
This page allows you to generate a link, which when visited will allow you to invite your bot and assign it the necessary permissions. The link can be generated on this page, but to simplify things here is a pre-made link. Simply copy the “Client ID” value as seen in the above screenshot, and replace YOUR_CLIENT_ID with it in the below URL:
https://discord.com/oauth2/authorize?client_id=YOUR_CLIENT_ID&permissions=2415938561&integration_type=0&scope=bot+applications.commands
Alternatively, you can generate the link yourself by selecting “bot” and “applications.commands” under “Scopes”, and then the following under “Bot Permissions”. The “Generated URL” will then be available near the bottom of the page:
- Manage Roles
- Create Instant Invite
Read Messages/View Channels- Send Messages
- Embed Links
- Use Slash Commands
Once you’ve got a URL either way, visit it and invite the bot to your server.
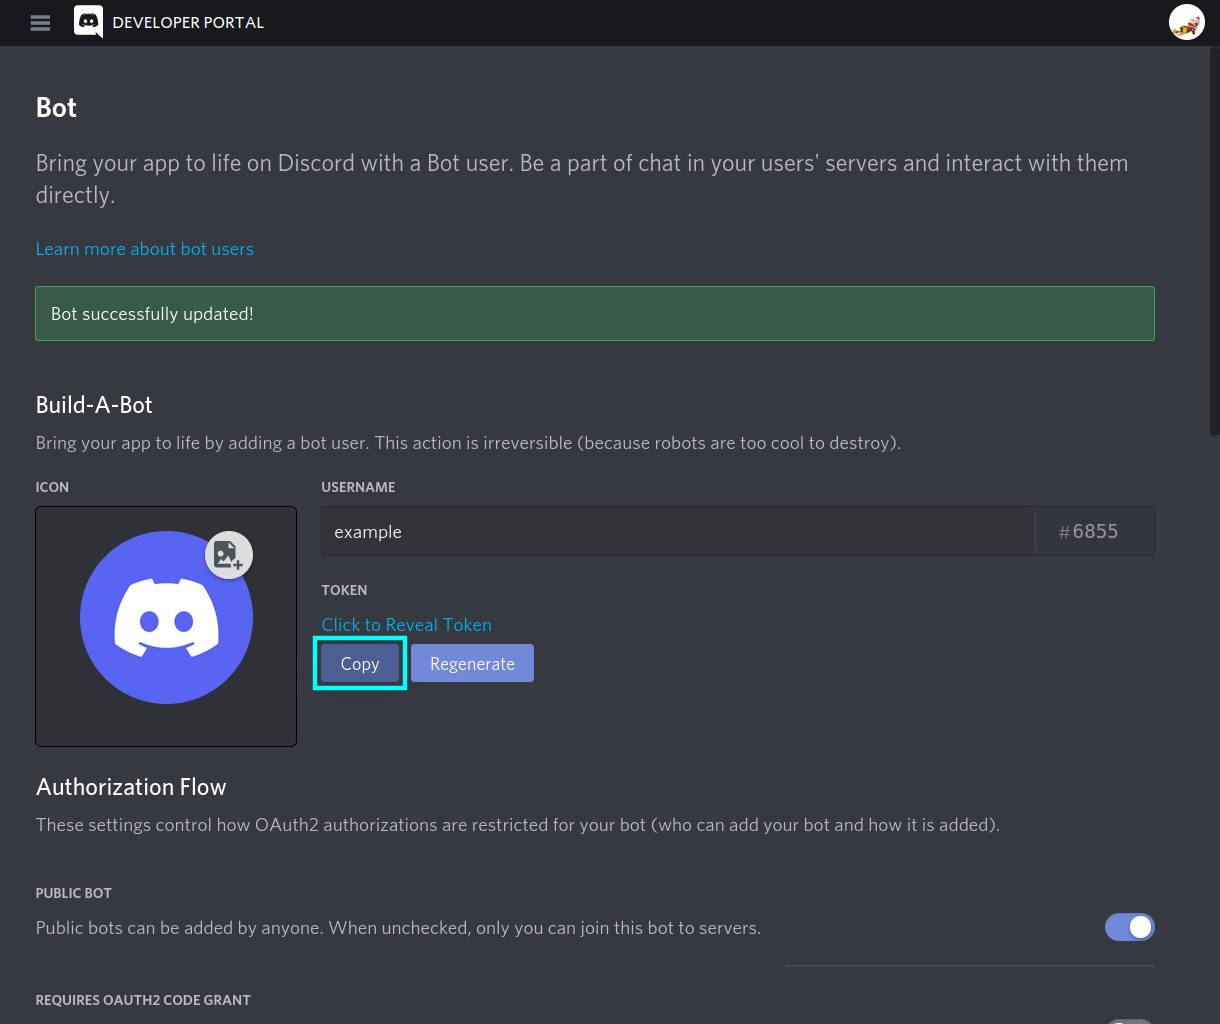
7) Copy the token #
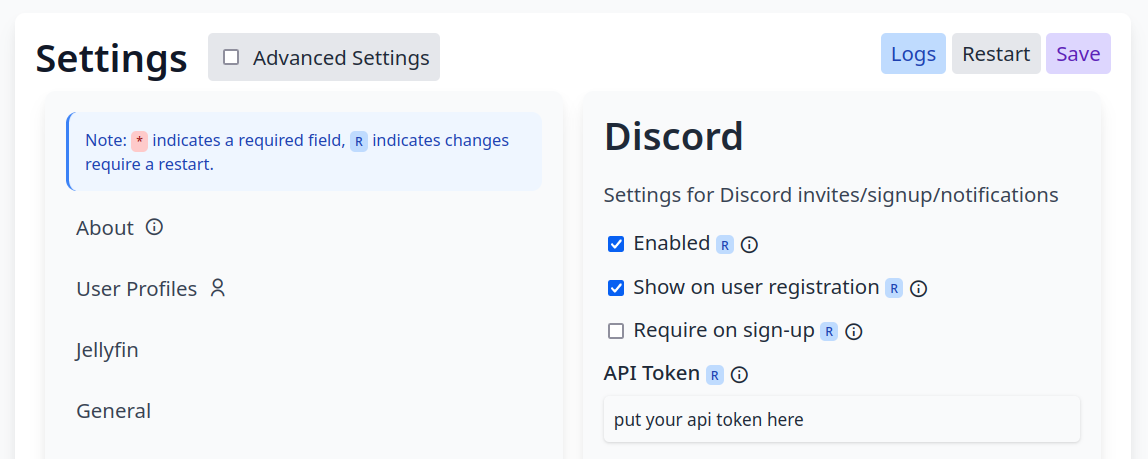
Switch back to the “Bot” tab. Under “Token”, press “Copy” if it exists, or press “Reset Token”, answer yes when prompted, then copy the token. In jfa-go, go to Settings > Discord, enable it, and paste the token into the “API Token” box. Save and restart.
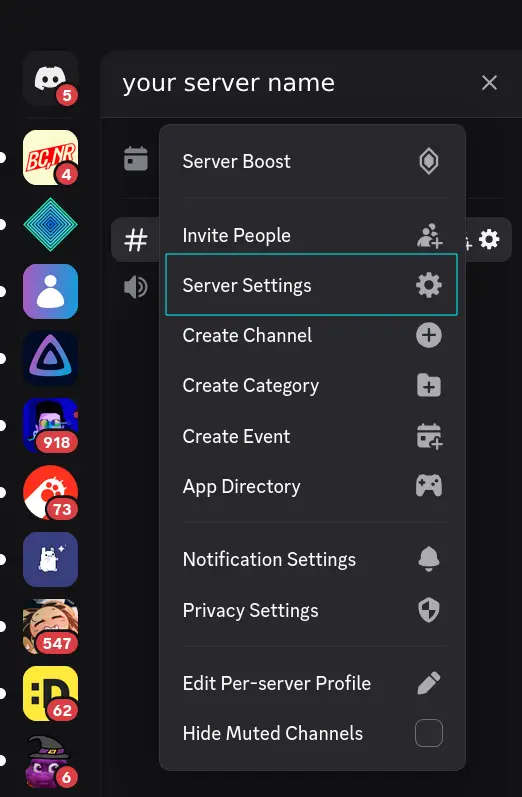
8) Grant the bot instance its permissions #
You’ll next need to make sure the bot’s role (which itself creates) has the correct rank and permissions. Open server settings by opening your server, clicking the name in the top left and selecting “Server settings”:
From the newly-shown sidebar, go to the “Roles” section. If you want jfa-go to apply a specific role to users who have signed up, you’ll need to drag your bot’s role (probably “ role”) above that role. A drag-anchor will appear on the left when you hover over it. Also, if you face any issues with the bot, try dragging it right to the top, and lowering it until your issues come back.
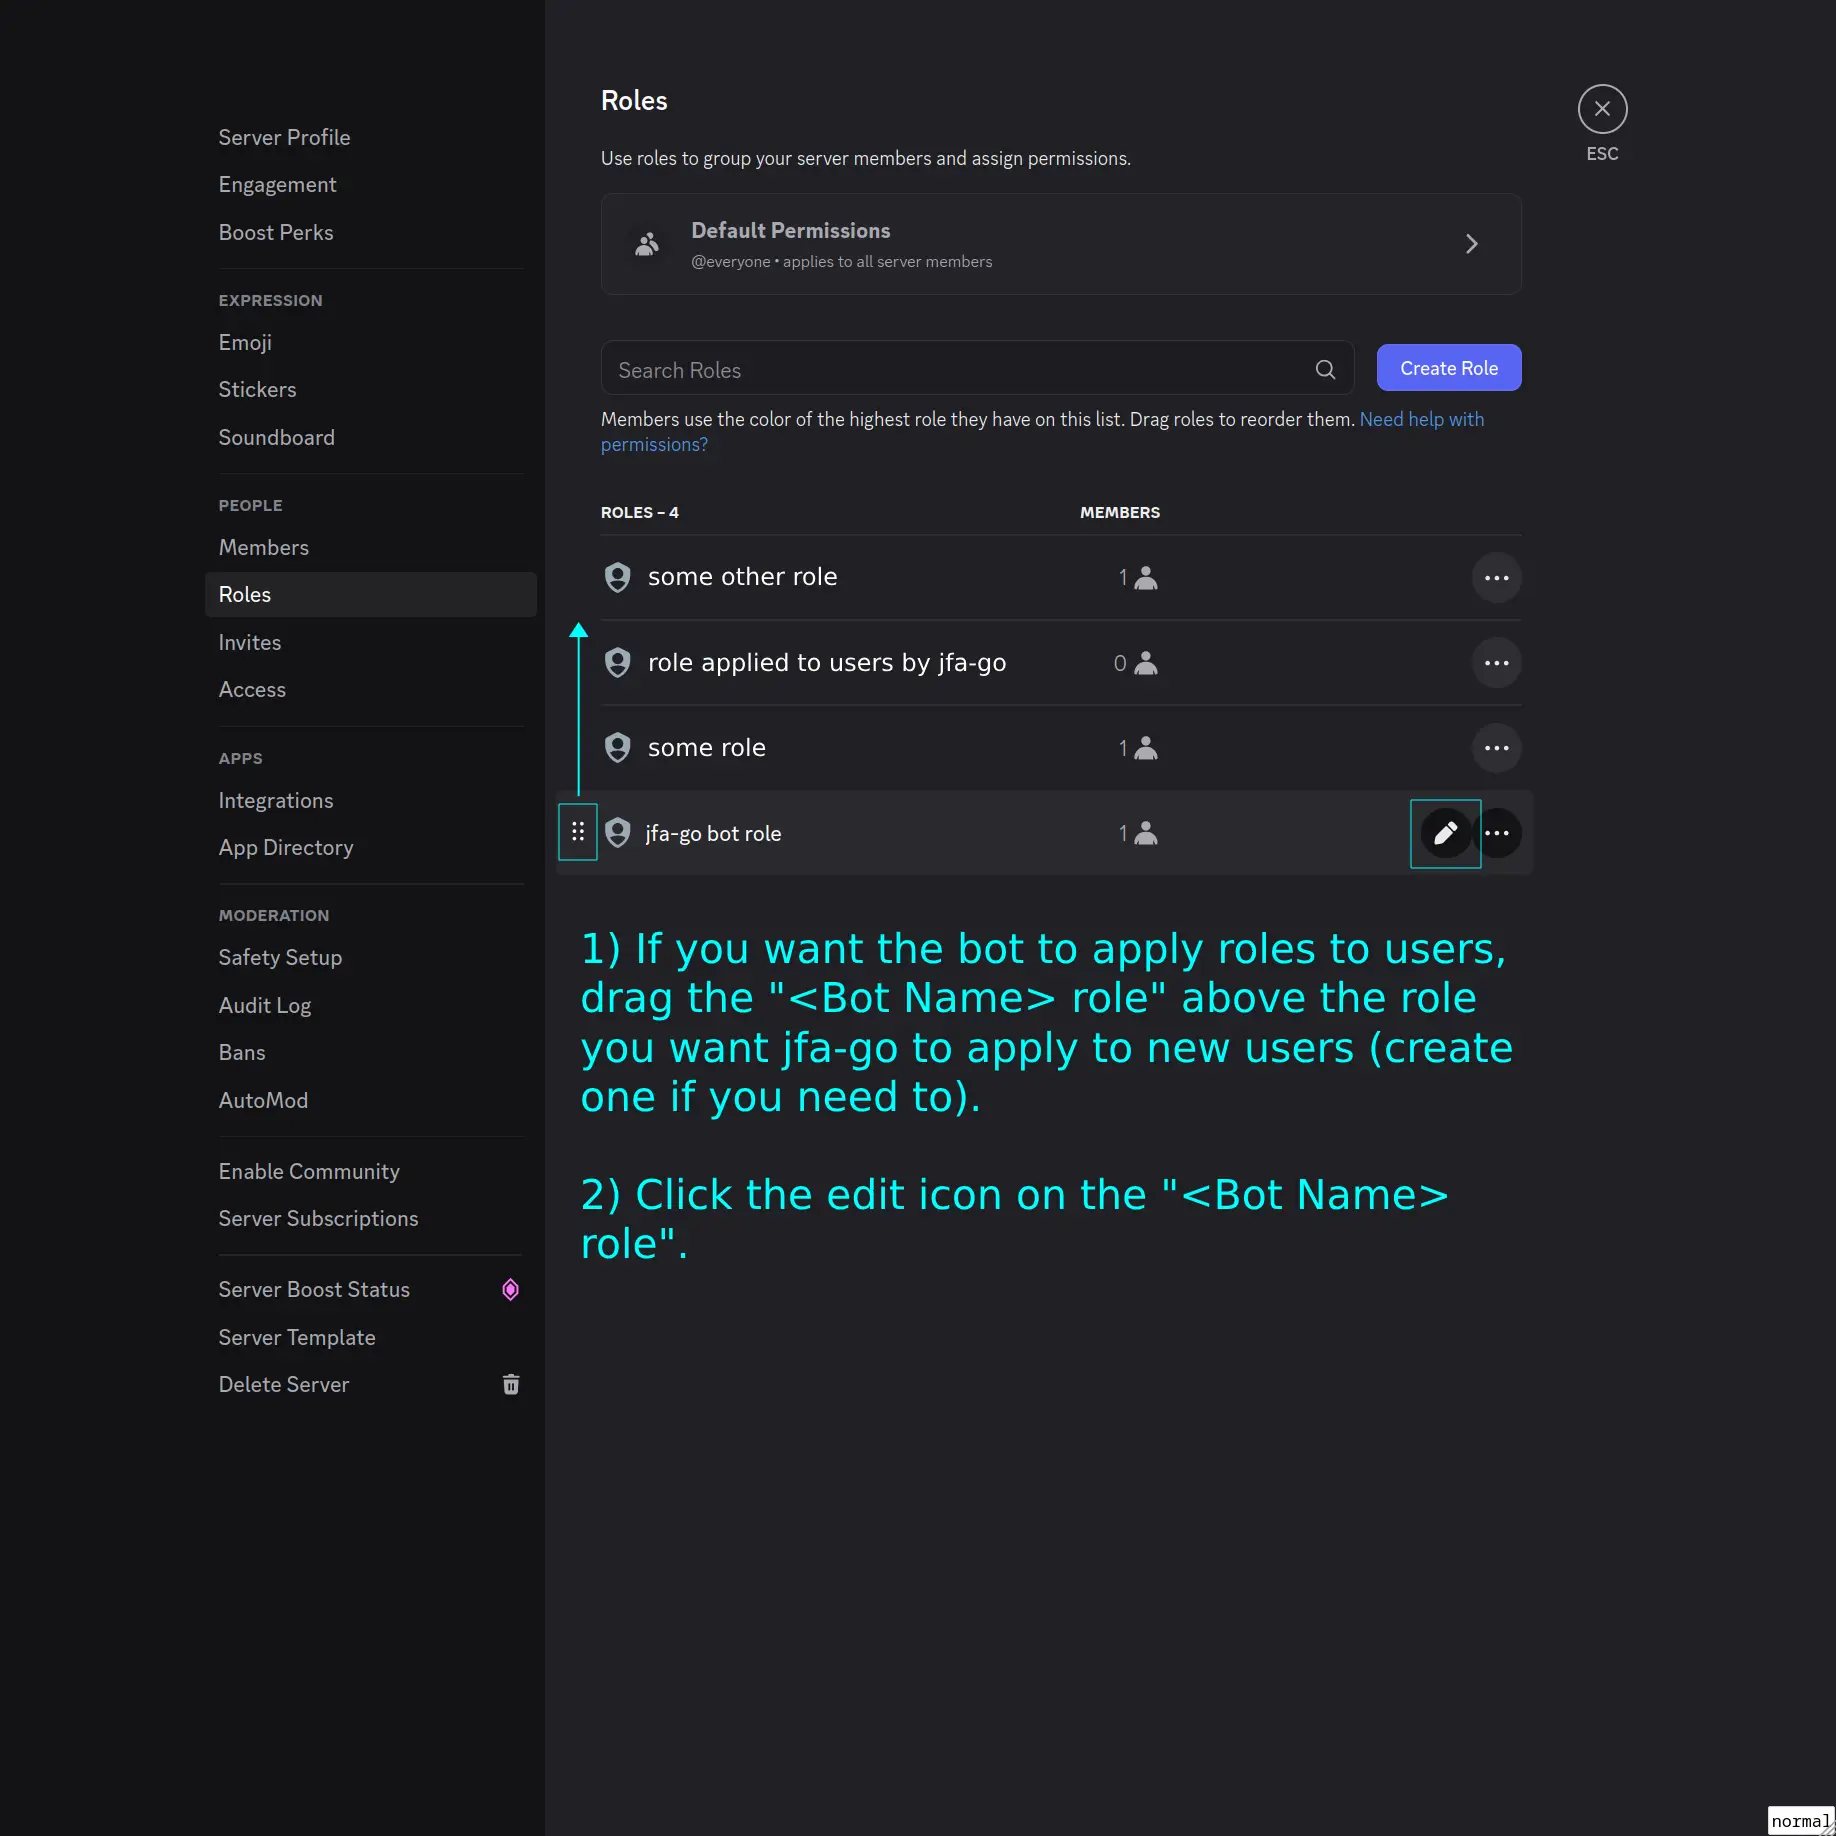
Once it’s in the right place, click the edit icon on the role to bring up a new page. Select the “Permissions” tab as shown:
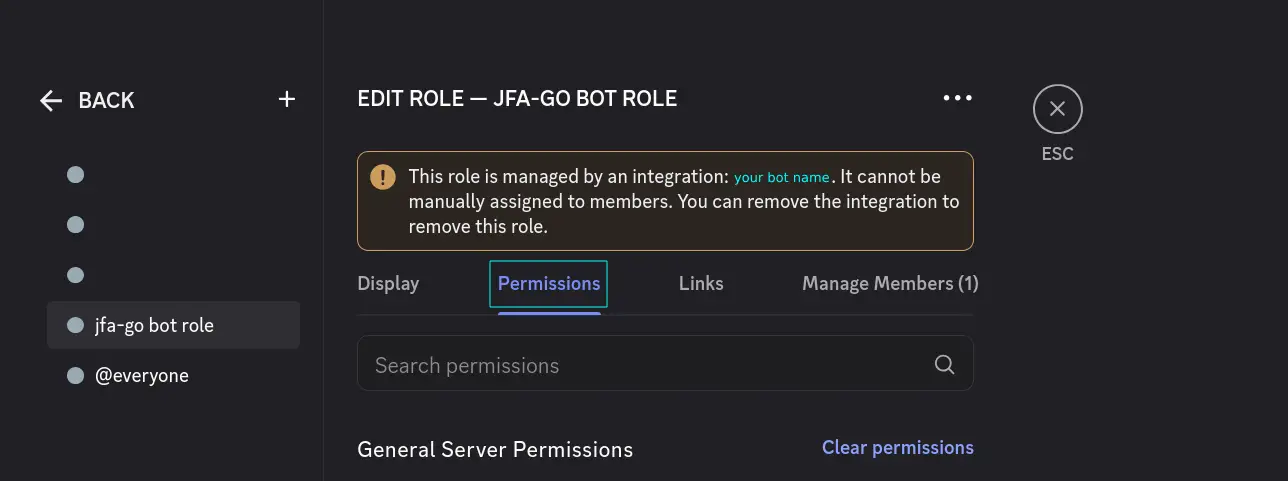
In this list, enable the following permissions (if they aren’t already):
- View Channels
- Manage Roles
- Create Invite (If you want an invite to be shown on the invite form)
- Send Messages
- Embed Links
- Use Application Commands
Make sure to press “Save Changes” after!
If you face any further issues, check your jfa-go logs and look for permissions errors, they often have a description of the missing permission which you can then come here to enable.
9) Done! #
Once you’ve restarted, you should be able to add new users in the Account tab, and link your discord on the sign-up page. You can also tell jfa-go to assign a discord role to new users in Settings > Discord (make sure you’ve made your role and put it in the right position in the above described list).